Protecting Exposed Wood Siding From UV Damage in Southern California
Home / Blog
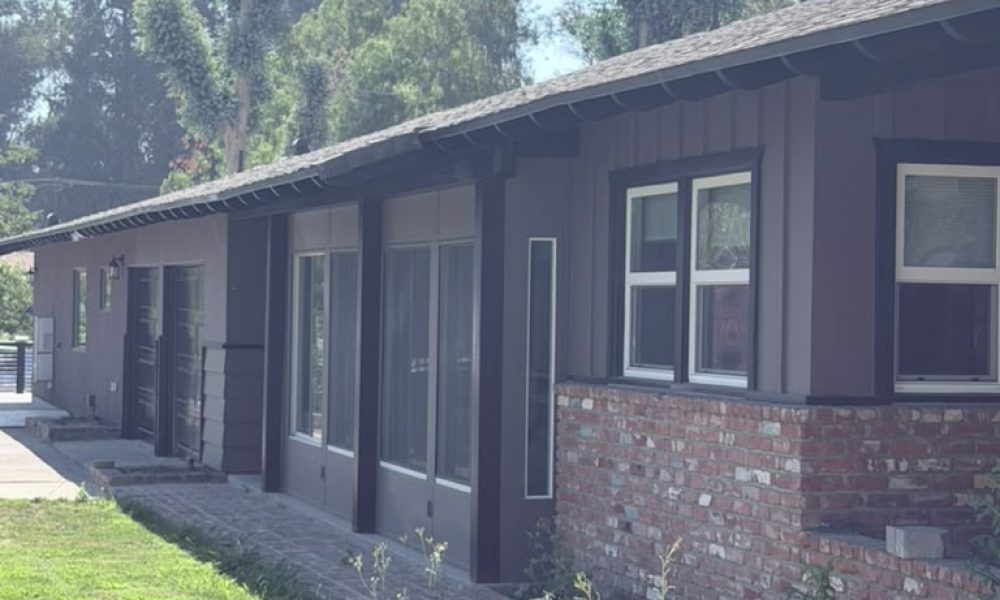
Wood siding is one of the most visually appealing exterior finishes a home can have — warm, textured, and full of character in a way that stucco and fiber cement rarely match. But in Southern California, that natural beauty comes with a real maintenance obligation. The same sun that makes Ventura one of the most desirable places to live in the country is also one of the most relentless forces working against unprotected wood on the exterior of your home.
UV radiation, heat cycling, and in coastal areas, salt air, combine to degrade wood siding faster than almost any other climate condition. Understanding how that damage happens — and how to stop it — is what separates wood siding that looks great for decades from wood that needs full replacement in ten years.
How UV Radiation Damages Wood Siding
UV damage to wood is a gradual process, but it’s constantly in motion on any unprotected or under-protected surface exposed to Southern California’s sun.
- Lignin breakdown: Wood gets its natural color and structural integrity partly from lignin, a complex compound that binds wood fibers together. UV radiation breaks down lignin at the surface level, causing the wood to turn gray, lose its original color, and become increasingly fragile at the surface.
- Surface drying and cracking: As UV rays penetrate the wood surface, they accelerate moisture loss from the fibers. This causes the wood to dry, shrink, and eventually crack along the grain — creating pathways for water to enter and accelerate rot.
- Paint and coating degradation: UV radiation doesn’t just affect bare wood — it also breaks down the binders and pigments in paint and coating systems applied over wood, causing fading, chalking, and eventual film failure that exposes the wood beneath.
- Heat amplification: Dark-colored wood siding absorbs significantly more solar heat than light colors, which compounds UV damage with thermal stress — repeated expansion and contraction cycles that stress the wood fibers and any coating applied over them.
Signs Your Wood Siding Already Has UV Damage
Before choosing a protection strategy, it helps to assess where your siding currently stands. UV damage progresses in stages, and the right approach depends on how far along it is.
- Graying or color fading across board faces that were once richly colored — the first visible sign of lignin breakdown
- Rough, splintery surface texture where the wood grain has lifted and separated at the surface
- Hairline cracking along the grain on board faces or at the edges of boards and battens
- Peeling, flaking, or chalking paint that reveals bare or discolored wood beneath
- Soft spots in board faces or edges where moisture has entered through UV-damaged cracks
- Cupping or warping of individual boards as moisture imbalance develops between the protected interior face and the UV-exposed exterior face
Early-stage damage — graying and surface roughness — is fully reversible with proper refinishing. Mid-stage damage involving cracking and paint failure can be addressed with thorough prep and appropriate products. Late-stage damage with softening and structural compromise typically requires board replacement before refinishing can proceed.
Step 1: Start With a Thorough Cleaning
No protective coating performs well over a contaminated surface, and wood siding accumulates significant contamination in Southern California’s environment — dust, pollen, airborne particulates, mold, algae, and salt deposits near the coast.
Pressure washing at an appropriate PSI for wood — typically 600 to 1,200 PSI depending on the wood species and condition — removes surface contamination without raising grain or damaging wood fibers. Areas with visible mold or algae benefit from a pre-treatment with a wood-safe biocidal cleaner before washing.
After washing, wood siding needs complete drying before any coating is applied — a minimum of 48 hours in Ventura’s climate, longer after extended periods of moisture or cool weather. Trapping moisture under a new coating is one of the fastest ways to cause premature failure.
Step 2: Sand and Prep the Surface
For wood siding that has grayed, developed surface roughness, or is carrying a failing previous coating, light sanding before refinishing opens the wood grain and creates a clean, receptive surface for new product.
- Bare or grayed wood benefits from light sanding with 80 to 100 grit to remove the damaged surface layer and expose fresh wood beneath.
- Previously painted or stained wood in good condition may need only light scuff sanding to improve adhesion for the new coat.
- Heavily weathered or cracked surfaces may require more aggressive sanding or, in the case of deep cracking, wood filler or epoxy consolidant before sanding.
Always sand with the grain, not across it, to avoid leaving visible scratch marks that telegraph through the new finish.
Step 3: Choose the Right UV-Protective Coating
This is the most consequential decision in the entire process. The right product for your wood siding depends on the current condition of the surface, the look you want to achieve, and how much maintenance you’re prepared to commit to going forward.
Solid Color Exterior Paint
For maximum UV protection, solid color exterior paint — applied over a quality wood primer — provides the highest level of pigment-based UV blockage available. The paint film physically shields the wood surface from direct UV exposure. Premium 100% acrylic exterior paints with UV-resistant pigments are the top choice for painted wood siding in Southern California.
- Best for: Wood siding in fair to good condition, homeowners wanting maximum protection and color consistency
- Reapplication: Every 5 to 7 years with proper prep
- Trade-off: Conceals natural wood grain; more involved to strip if switching products later
Solid Color Stain
Solid stains provide UV protection comparable to paint but penetrate the wood surface rather than forming a film on top, which reduces the risk of peeling on textured or rough-sawn wood surfaces. A good choice for board and batten siding where the texture should remain visible.
- Best for: Rough-sawn or textured wood siding, surfaces with previous stain history
- Reapplication: Every 3 to 5 years
- Trade-off: Less UV blockage than full paint; grain texture visible but not color
Semi-Transparent Stain With UV Inhibitors
Semi-transparent stains allow wood grain and color to show through while adding UV inhibitors that slow lignin breakdown and color fading. They work best on wood in good condition — they won’t hide existing damage the way solid products do.
- Best for: New wood or recently refinished siding in excellent condition
- Reapplication: Every 2 to 3 years in Southern California’s UV environment
- Trade-off: Less UV protection than solid products; shorter reapplication cycle
What to Avoid
- Clear finishes without UV inhibitors: Film-forming clears like polyurethane trap moisture in wood and peel aggressively in Southern California’s climate. Avoid on exterior wood siding.
- Interior products used outdoors: A common and costly mistake — interior paints and stains lack the UV stabilizers, mildewcides, and flexibility additives that exterior products require.
Step 4: Pay Attention to the Details
On board and batten siding and other profiled wood exteriors, certain areas are consistently more vulnerable to UV damage than others and deserve extra attention during refinishing.
- Batten tops and board edges receive direct sun exposure from above and tend to dry and crack faster than flat board faces
- End grain at trim intersections absorbs moisture and UV damage faster than face grain and benefits from an extra coat of primer or end-grain sealer
- South- and west-facing elevations receive the most cumulative UV exposure and may need recoating sooner than north- and east-facing walls
Maintaining Protection Over Time
Even the best coating system has a finite lifespan in Southern California’s UV environment. A proactive maintenance schedule keeps protection in place before damage has a chance to develop.
- Annual inspection: Walk the perimeter of your home each year looking for fading, cracking, peeling, or areas where the coating is wearing thin
- Spot treatment: Address small areas of coating failure as they appear rather than waiting for a full repaint cycle — this keeps the wood protected and reduces the scope of the next full refinishing project
- Recoat on schedule: Don’t wait until the coating has fully failed. Recoating over a sound but fading finish is far easier and less expensive than refinishing bare or damaged wood
Protect Your Investment Before UV Damage Gets Ahead of You
Wood siding is a feature worth protecting — and in Southern California’s UV environment, protection requires more than occasional touch-ups. The right products, applied correctly and maintained on schedule, keep wood siding looking rich and performing well for decades rather than requiring premature replacement.
At RM Empire Painting, we specialize in exterior wood refinishing and painting for homes throughout Ventura, CA, including board and batten, ranch-style, and Craftsman properties where exposed wood siding is a defining feature of the home’s character.
Ready to protect your wood siding before UV damage gets ahead of you?
Contact RM Empire Painting today for a free estimate.
Our Services
Get A Free Quotes
Got any questions ? Feel free to call us !
Do you have any questions about our services or would you like to request a free estimate? Don’t hesitate to call us at (805) 746-5140. At RM Empire Painting we are always available to provide you with personalized advice and help you transform your spaces with the quality we are known for. Contact us today, we’ll be happy to assist you!
Whether you’re looking to refresh your home or enhance your business, our team of licensed and insured professionals is here to deliver exceptional results.
Our Services
Copyright ©2026 RM Empire Painting, All rights reserved. Powered by Orbis Advisers.